Showing posts with label Anniversary. Show all posts

May 22, 2017

Romantic Music Theme Explosion Box

Hi everyone! Today I have a multi-layered Magic Explosion Box to share with you. The paper pack used here is from DCWV Autumn collection. I have used some metal embellishments and vintage ephemera to give it a vintage feel. 

This is how the box looks when closed.


Cute little metal charms, ephemera and embellishments adorn the lid of the box.


The box has three layers inside with lots of space for journaling and pictures. This is the outermost layer that has space for photos. 


This is the second layer which can also hold more pictures tucked behind the chipboard embellishments. 


The innermost layer has pockets to hold tags that can be used for journaling. It has more space outside for journaling.


In the centre of the explosion box is a miniature wooden piano. I made a mini music book to be placed on top of the piano. Also placed a small bouquet and metal clock charm on it.


July 27, 2016

Center Step Card - Mudra Lotus Blooms

Hi friends, today I have a very special card to share. It's special because after a long time I made a special fold card.  As I was looking at my old creations, I realised how many different types of folds we used to create as opposed to the simple top folding cards that we make nowadays. So I thought why not try something different with these beautiful watercolored Lotus Blooms.

To begin with, I watercolored and fussy cut my stamped images. Then I created a center step card base and distressed the front part with distress inks. I splattered some water droplets on it to give a nice look on the background. I adhered a couple die cut image on the first step fold and added the lotus bud and a leaf at the last fold of the center step card. 

I arranged the floral images and leaves on the front portion of the card and embellished it with some mdf leaves and added a few sequins to complete the card.


Challenges Entered

PABD Challenge #8 - Only Layers

September 4, 2015

Anniversary Explosion Box

Hello! This is an anniversary explosion box that I made recently on order. The client referred to one of my earlier explosion box that I had made and wanted a similar one for her special day. I have improvised a bit on the earlier one by adding additional heart flaps on the four corners and have also changed the layout of the chairs.


\


Here a quick video of the explosion box.


Thanks for visiting!!

February 22, 2015

Altenew Vintage Roses stamp

Hello everyone!! Today I am posting after a long time. I hardly find time any for crafting with my little one around. But trust me, its a lovely feeling and I am loving being a full time mommy.
 
Inspite of such busy schedules I managed to lay my hands on some of the new stamps and was very eager to try them out. One such stamp set is the Altenew Vintage Roses stamp which is very sought after by stampers nowadays. It was a tough task to play with this stamp set as it is a bit tricky and requires a lot of practice. After some successful and not so successful trials I managed to get some pretty roses. I decided to fussy cut and use the good ones to make a card. At the same time I tried out another stamp set which is WPlus9 Pretty Little Peonies..... so my card has a mix of elements from both these pretty sets. The sentiment I heat embossed using Ranger Gold embossing powder. I have also use a golden paper for matting to give a golden outline to the main card piece.


Below is a snapshot of the trials I did. I used watercolor paper, glossy paper and normal paper. And the inks I tried were Archival inks and Memento inks. In case you have any queries, I would be happy to help you out.
One of my crafter friends Neha Bhatt has also done her review on this stamp set. If you like to read her post, please visit her blog here.

Thanks for dropping by. Do let me know your views on the card.

June 25, 2014

Accordian Card - Red and Grey

Hello. Today I am posting a special fold card - Accordian Card. The color theme is mainly red and grey. For the embellishment, I have mainly used a mix of prima flwoers, satin roses and leaves.


This is how the card opens up.
 

February 12, 2014

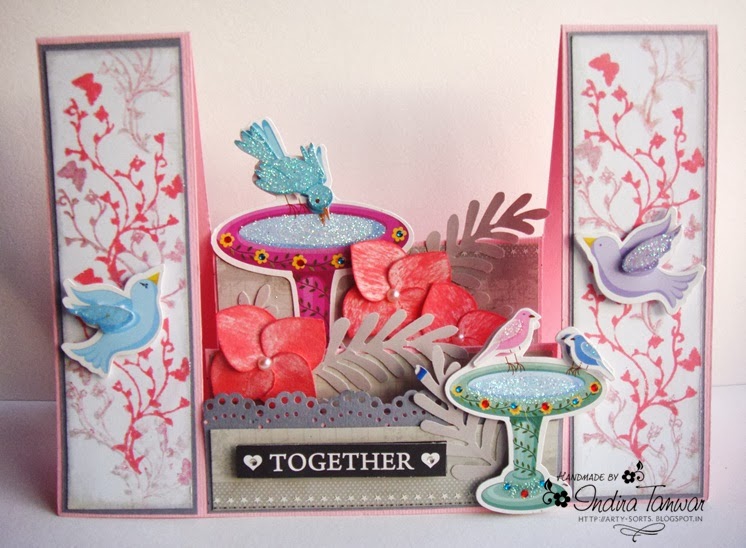
Center Step Card for Love Birds

Hi friends! Hope you all are doing great. Today's card is a very different type of card that I attempted and the color combo that I have used is also something I never tried before.

I am not sure if its called a center step card. I had followed a template from the net to cut this long back and I took it out recently to work on it.

For the panels I did some stamping with the same stamp twice using two different colors. I am forgetting the name of this technique right now. For the center steps I used Itsy Bitsy's sticker backing paper as matting. These pretty stickers are also from Itsy Bitsy. The flowers are handmade using this template.


A close-up of the center... the leaves are punched from an old brochure.

Challenges entered
Crafting for all Seasons - #70 Romance
Crafty Creations - #256 for the birds
Paper Minutes - #308 Love is in the air

October 28, 2013

Black and White Anniversary Card

Hi folks. Here is a quick post to share a card I made particularly for Sindhu's challenge.
Its a Black and White Anniversary Card. The sentiment is a digi. The couple silhouette is from internet. I traced it and handcut it. The black and white border is from Itsy Bitsy. I have added some lace below the border to add a touch of elegance.


Challenges entered
The Crafting Cafe - Anything Goes
Perfectly Rustic - Pattern Paper

October 10, 2013

Accordian Card

Hi friends. I made this accordian card for my mom dad's anniversary. It is inspired by 2 cards: Isha's card at Lulupu and Monica Jot's Card .I absolutely love their style and work.
The pictures were taken in a hurry and they do not reflect the real colors and beauty of the card. I have distressed the papers with broken china and peacock feathers ink and it looks very nice when you see it in real. For pink, I have used worn lipstick distress ink.

There are many layers on the front side of the card. First is the PP, then die-cut, silver net and then the die-cut rose image.


A close-up of the roses. This is from Lucy Cornwell's paper pack [Love it!!] I applied a bit of silver stickles on them for a shimmery look. The paper pack and diecuts are from Nupur's store.


Here is an inside view of the card. The sentiment stamps are from Fiskars.


Challenges entered
Lulupu #18 - Load it up! [3 Layers: PP, Die-cut, net; Embellishments: Ribbon, pearls, diecut roses]

April 18, 2013

Chipboard Love Album

This is a 5x7 Chipboard Love Album that I made on order. The abum has 6 leaves and so I have incorporated lots of folds inside to accomodate more pictures of the client. She is getting married soon and wanted to gift it to her would-be.

This is the cover of the album.
Page 1 and 2

Page 2 has a accordian fold mini card that opens up to display 4 photos. It has a tag behind for journalling.

Page 3 and 4

Page 3 has 2 photos placed in a pocket with a window. The pocket is big enough to hold more photos and has a tag that can be used for journalling.

Page 4 is a gatefold card that has to be untied. Did you see that cute dolpin charm? It was sent by Mallika as a RAK :)

The inside has a flap with a photo on it.

The flap opens up to reveal another photo and has a place to write messages.

Page 5 and 6

Page 5 is another folded card. There is a photo on top, and when untied it reveals 2 more photo and has space for writing.

Page 6 is another folded card with one picture on top and a sentiment written on a flap that overlaps on the photo.

The card opens up likes this.

Page 7 and 8

As you can see I made a heart shaped mini card on page 7. It has photos on top and inside.

Page 8 is a telescope card. (I guess I used most of the folds I knew :) LOL )

Page 9 and 10

On page 9, I made a joyfold card. 

On page 10 I made a variation of a pocket fold card so that it opens up to show a photo and space for journalling.

Some snapshots of the punched flowers...

The client loved the album and that makes me so happy :) Hope you too like it!

Challenges entered
Dutch Dare Card Challenge - Anything but a card
Sassy Studio Designs - #173 Fancy Fold

January 18, 2013

Wedding Card with MS Punches

Hi all. I made this card and this quilled photo frame for a client who wanted to gift it to her niece immediately after her wedding in court. The bride was thrilled to receive this handmade surprise gift.
To add a personal touch, she added the couple's photo on the tag along with a hand-written message.
The flowers on the band are handmade using 5 petal punch.
The client had to carry the box to Delhi, so I made a sturdy packaging for the card and frame. I upcycled a sweet box by covering it with fancy paper, to hold the gifts.
Here's a peek at the full package..
Thanks a lot for visiting my blog and showering me with so many wonderful comments. I love reading all your comments.

Challenges entered
For the Love of Crafting Challenge#11 - Fancy folds
Related Posts Plugin for WordPress, Blogger...