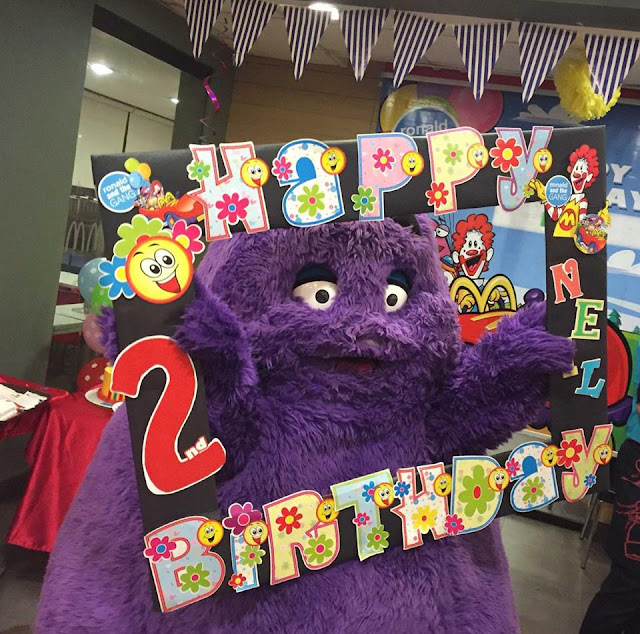
Hello everyone. This is such a delayed post! I am sharing details of my son's 2nd birthday celebrations which was in July 2016.
We planned the Birthday party at McDonalds and availed their Ronald McDonald Birthday Party Package. Below I am sharing a few DIY projects and the cake that we ordered to match the theme.
A. First DIY - Photo Booth Frame
1. For this project I took a large cardboard box and cut a frame out of it.
2. Then I covered the frame with black chart paper.
3. I bought this readymade HAPPY BIRTHDAY banner from a local party supplies store and cut-off the bits and brads that held the alphabets together, thus separating all the alphabets.
4. I adhered the letters on the top and bottom part of the frame, as in pic below.
5. I also drew the number 2 with red card stock and added it onto the frame.
6. I added the smiley on the left, which was a part of the birthday banner.
7. The 'Ronald and the gang' images are from the birthday invitation that were given as part of the party package.
8. Lastly I added my son's name with the chipboard letters that I had in my stash. The alphabets were plain white, so I colored them to match the rest of the frame.
The final frame
B. Second DIY - Photo props
1. I made the photo props from the party hats that are given as part of the birthday package by Mc Donald's. Once you sign up for the party package, you are provided with a set of goodies matching the theme that you choose. These include party invitations, hats, table mats, return gifts and hoards of game prizes.
2. Out of the four characters in the Ronald theme I used up Ronald's cutout in the frame above.
3. I then used the rest of them to make 3 photo props below.
4. Simply cut out the design and stick them on wooden skewers. I also added the 'Ronald and the gang' badge from the party invites.
C. Birthday Cake - In Ronald McDonald theme
I wanted a cake in red and yellow to go with the theme colors. We got one custom made from a home baker.
D. Third DIY - Cake Toppers
1. I made cake toppers from the party invitation cards that were provided to us.
2. Simply fussy cut the image and stick them on wooden skewers like I did for the photo props.
These are the birthday invitations provided by Mc Donald's. I used a few of them for my DIY projects.
I must say I really liked the party packages that Mc Donald's offers. I have jotted down a few pros for the same...
1. You can choose from an array of available themes like Ronald McDonald, Spongebob, etc.
2. You get matching paraphilia for the party.
3. Standard decor and table set-up.
4. Party backdrop
5. Mascot appearance as per theme
6. Party host and MC
7. Standard McDo meal packages and custom packages available too
8. You can order their standard cake or get your own
9. They usually have tie-ups with event planners in case you want to setup additional candy tables, etc.
10. They also liaison with some photographers who have various packages and custom photo booth options.
11. The return gifts are nicely packaged in their custom theme boxes.
12. They offer loads of themed goodies as prizes for all the games.
The table set-up....
Mascot appearance....
My son was in love with this mascot and danced so much with him.
If you have queries regarding the DIY's or related to the birthday party at Mc Donald's, please leave a comment below and I shall answer it as soon as possible.
Thanks a lot for dropping by!!


