Showing posts with label Kids Crafts. Show all posts

October 6, 2015

Baby Name Monogram

Hello! This post is about a Monogram I made for a baby girl. The baby's name is Shrunal, and hence the S shaped monogram. I used a pretty pattern paper to cover the cardboard 'S' shape and then embellished it with flowers, chipboard elements, a handmade heart embellishment, some die-cuts, etc.


I used alphabet stickers for the baby name and stuck it in the form of a filmstrip.


Here is a quick look at the video of the monogram.


Thanks for coming over at my blog!

April 30, 2015

Multifold Keepsake Box

Hello guys. Recently one of my friends asked me to create a keepsake box for her little baby boy. She wanted to keep tiny stuff in the box and at the same time wanted it to be a bit sturdy as well.  The brief was to use bright spring colors and figures to make it look attractive for the baby.

Here is the box that I created. It is a multifold box..... not sure if there is any other specific name for this. It has four cascading compartments to store stuff and it closes neatly into one compact box with lid.


I used small pieces of velcro to fasten the box with straps. The leather looking cover is actually a paper which I got from a local store. It gives a very sophisticated look to the box. When opened it gives a bright and cheerful look with all the fun colors and the foam animals and figures.


Challenges entered
BGC #67 - Spring green with spring elements

October 21, 2013

Quilled Name Plate - Angak

This is another quilled name plate that I made on order recently. Since it is for a boy, the color palette is mainly blue. I didn't want to keep it simple and straight forward so I have overlapped the alphabets and arranged in this manner.

The work is this name plate is very minute and it took me more time to create this as compared to other one I made for NAVIKA


 Few close-ups...

If you wish to see more of my name plates click here.
Thanks for dropping by and for your sweet comments! Have a great day!!

Challenges entered
Itsy Bitsy - Anything Goes
DCAM Challenge #3 - Photo inspiration

October 17, 2013

Quilled Name Plate - NAVIKA

Hi friends! I am very excited to share this Quilled Name Plate that I made on order. I had very little time in hand to finish this owing to work and festivities, but I am glad I could deliver it on time.

Though I have made many Name plates for kids in past, this was my first quilled name plate for a kid. I had made one quilled name plate for a couple using bee hive technique. But I have tried this type of quilling technique for the first time. I would like to thank few bloggers whose work inspired me.

So here goes the Quilled Name Plate for baby Navika.


 A close-up angular shot..
  Side view...


 Another side view...


Few more close-ups


 Hope you like my work. Would to glad to hear your comments/suggestions!

Challenges entered
Itsy Bitsy - Anything Goes
DCAM Challenge #3 - Photo inspiration
A Creative Romance - Pink
Alphabet Challenge - R for Roses

June 27, 2013

Baby Album

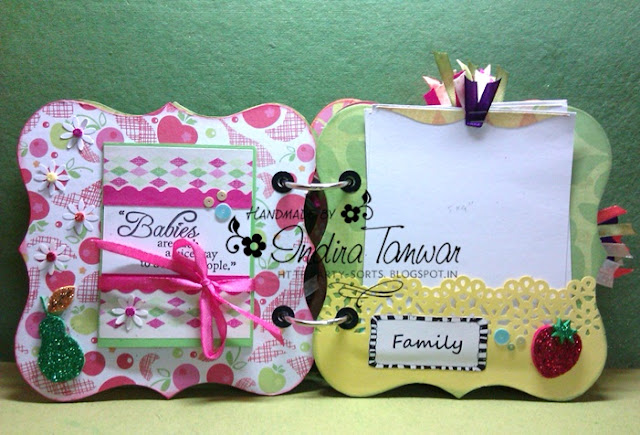
Hello friends. This is another chipboard baby album that I made on order. It is meant to record events for baby's first year. You can see my other albums here.

I have used K & Co. paper stack for the album and made my own embellishments with glitter foam sheets. I have chosen all bright papers from the stack and made co-ordinating embellies to go with it. I have used lots of sequins to the album pages for a bit more bling.


I colored that pink plastic safety pin to green with my nail polish :)

 Do you see the watermelon slice there? And the glitter flowers and gift box. Also take a note of those tiny little footprints.


Aquick round up of all the glitter embellishments that I made for the album.

 Sorry the pictures are not that great as I was in a hurry to pack it and send.

Challenges entered
Itsy Bitsy - All that Glitters

May 29, 2013

Chipboard Baby Album

Hello friends. This is a chipboard baby album that I made on order some time back. It is meant to record events for baby's first year.


Pages 1 and 2
Page1: To note the birth stats of the bay
Page 2: To stick the very first picture of the baby

Pages 3 and 4
Page 3: It is a folded card to stick pictures of the baby along with pictures of mom and dad on both sides.
Page 4: It is an insert to stick picture of the baby with the full family.

 Page 3: This is how the folded card opens.

Page 5 and 6
Both these pages have pockets to store 2 inserts each. These pages are dedicated to save baby's firsts, like baby's first crawl, first tooth, first solid food, etc.

Page 7 and 8
Both these pages have pockets to store 2 inserts each. These pages are dedicated to save baby's favourites, like fav dress, fav toy, fav song, etc.
Did you guys notice these cute critters? They are stamps and I have stamped them on colorful PPs and then fussy cut.

Pages 9 and 10
Page 9: This is again a folded tie-up card to record baby's growth years.
Page 10: This page is created to store memories related to baby's first birthday.

Page 9: This is how the tie-up card opens. It has a pocket with lots of tags to write notes. For the right side I made an accordian fold where the parents can stick pictures of baby and write their messages on. I have not stuck it so that it is easy to stick pics, and later on it can be attached to the card base.

Page 10: This open up card is meant for details of the first birthday along with pictures.

This is my first ever baby album, and it has gone all the way to US. I hope the new parents love it :)

Challenges entered
Crafter's Corner #8 - Summer Sundae
Used lots of PP, Punches, Many embellishments and Glitter alphabets and Glitter foam sheets on last page.
Crafty Ribbons - Anything Goes with Ribbon
Ruby's Rainbow - #55 Baby
V's Sweet Ideas Blog - Baby theme

March 22, 2013

Cascading Card - With innovative use of punches

Hi. I had made this card as DT for Lulupu blog. I have used lots of punches for this card and I have some tutorials below to share with you.

The card is a cascading card with animal/forest theme.
 I made a tag to write message. This tag can be placed in a pocket at the back of the card.
Some close-ups..
 These are the various punches used in this card.

  Tutorials on how I made the cute critters and other stuff..


Challenges entered
Itsy Bitsy: The First Annual ItsyBitsy Craft Awards 2012-2013
Card Makin' Mamas - Spring Colours
Chocolate, Coffee & Cards - Bring On Spring
Crafty Ribbons - One for the Boys
Dutch Dare Card Challenge - #209 Shaped Cards

February 6, 2013

Kids Name Plate - Samarjeet

This is the other name plate that I made on order for my friend's son. The other one made for her niece can be seen here. For all Kids Name Plates that I have made till now, please click here.
I also have a detailed tutorial on 'How to make Name plates for Kids'.

The theme of this name plate is 'Mickey and Friends' since these are Samar's fav cartoon characters.
 The alphabets,  flowers, stars and balloons are all hand-cut. I have used lots of cartoon stickers and small star stickers.


Thanks for visiting my blog. Have a great day.
Related Posts Plugin for WordPress, Blogger...