Showing posts with label Handmade Frames. Show all posts

February 3, 2014

Upcycled Photo Frame

Hi everyone!! Today I am sharing a photo frame that I upcycled. It was a small square handmade picture frame, with plain bronze paper on it. I thought to make good use of it by experimenting with some mixed media.

I glued scraps of PP on the frame with some mod podge. Coated the PP with some silver acrylic paint. Stamped randomly on the surface and attached some washi tape here and there. Then I used some waste material like red bull lid, broken bracelet, bolts, etc. The two hearts are made from perfume bottle boxes which had shiny cover on them.

Then I used a stencil to create a pattern with modeling paste on two corners of the frame. Once the paste dried up, I colored it using distress inks. Added a sentiment and black pearls to finish the project. Hope you all like my creation.


May 24, 2013

Anniversary Frame with Quilling

Hi. I am so happy I am back to quilling with these last few orders that I received. The client wanted a big frame with 3 pictures and a personalised message and lots on quilling along the pictures. This is what I came up with. The moment I got this order I knew I wanted to pick up pastel shades. The picture along after framing is not captured very well as I was in a hurry to ship it.


This picture will give you a much clearer glimpse of the frame. I wanted to give a nice background to the frame and not just quill on a plain paper. So I decided to use some pretty pattern papers. I took a print-out of the wordings that the client had sent.

The client specifically wanted these quilled birdies from my 'Love birds card', in the frame. A close up of the quilled birdies all glittered up!!

 Challenges entered:
Docerela Creations - #38 - Color Pallete

Charisma Cardz - #20 Here Comes Summer
Creative Moments - #17 Circles

MilkCoffee Challenge - Load on the Flowers
Penny's Paper-Crafty - #128 Circles
Crafters Corner - Summer Sundae
  1. Used 2 punches - Fiskars scallop punch & MS Doily lace
  2. Used 2 pattern papers
  3. 3 embellishments - Quilled flowers, butterflies, metallic button
  4. Dash of glitter on birds

May 23, 2013

Quilled Name Plate

Hi. I made this name plate on order. The color theme suggested was Red and Gold and the technique required was quilling with beehive. I have used 2 shades of red. Not sure if its visible through this picture. One of the WIP photo below shows it well. I have not incorporated too much design into this so that the names can be read clearly. I used a handmade paper from a local shop for the base. I painted it with bronze and golden paint to make the texture stand out and I really liked how it enhanced the overall look.

 A look at some work-in-progress images.


Do you see the difference in the bg color here. The bright bronze and gold makes it stand out.

This is my first attempt at a quilled name plate. Do let me know your frank feedback on this.

Edited: Thanks for your feedback friends. No, this is not my handwriting. I took a print out and traced it on paper as printing on handmade paper is not possible.

February 12, 2013

Quilled Photo Frame - Yellow

I made this frame on order on an urgent basis. The brief was to have contrasting colors. The pattern is same as my earlier frame.


Challenges entered
Artistic Inspirations - Anything Goes
Crafty Bloggers Network - Anything Goes

Make it Monday - always Anything Goes
There She Goes - Flowers

January 15, 2013

Abstract Frames

Hi all, this is the second set of frames that I made on order. You can see the other set here. This frame is based on this card of mine. The customer wanted the square cards that she could frame in the color scheme of Brown, Yellow ochre and Beige.


January 14, 2013

Floral Frames

Hi friends.... Today I am sharing a set of 3 frames that I made on order. These frames are inspired by this circular easel card made by me. The customer wanted me to make frames by using only the top part of the card in Black, White and Grey shades. She will be framing these circles.


The flowers are handmade without using any punches.
The PP used is from Paper Mania Capsule collection.


Challenges entered
Crafters Corner Challenge#4 - Anything but a card or LO
Dream Valley Challenges - Anything Goes
One Stitch At A Time - Anything Goes
613 Avenue Create #2 - Anything Goes

January 10, 2013

Quilled Photo Frame on Order

Hi friends. I know many of you have been telling me that I don't quill as much now. I too miss quilling a lot and I really feel a piece of quilled art really gains lot of appreciation among craft admirers :)
 
So here is a quilled photo frame that I made on order recently. The brief was to use subtle colors for quilling. Therefore I chose pink and to add a contrast added purple small flowers. For the first time I have combined punched leaves also along with few quilled leaves.
Here is a closer look at the flowers...
 
 
Challenges entered
Crafters Corner Challenge # 4- Anything but not a Card or a layout

May 9, 2012

Quilled Photo Frame

Hello everyone!! Today I am sharing a project that has been on my to-do list for a long time. I wanted to make a quilled frame. The project never took off coz I wanted to make the frame too from scratch. But when I got these ready made ones I thought why not give them a try!
So here it is.... Hope you all like it!!

 A look at the upper half...
 The lower half...
Happy crafting!!

September 11, 2011

Recycled Desktop Calendar

Hey there! Hope you all are having a nice weekend.
Today I am showcasing another recycled project of mine that I made yesterday.
I recycled an old desktop calendar into a double-sided photo frame, just in case you get bored of seeing one side all the time :) This is gonna adorn my hubby's office desk.

This is one of my pet projects and I have made it a couple of times earlier as well. (View ealier posts here and here for more ideas)
I loved making it all over again, and this time took pictures to show you how I made it.

Here is how to go about it:
1. Take an old desktop calendar and remove the leaves.
 2. Side 1 - Mark the area of the photo at the desired place on the calendar.
3. I used left over paper scraps to make the corners for holding the photo. It's a good idea to stick the corners on the surface before hand, so that you have an idea of how much space you have for decoration. Don't stick the photo on the frame so that you can keep changing the photo later on.
 4. Make the design on side 1. For the design on side 1, I used left over paper scraps to create the roses. The twigs are from my pot pouri. I added some beads on the twigs for an added effect.
I had seen jute twine in many creations of international bloggers. I made one for myself from the regular jute rope that we get. Like the anchor thread, the jute rope has numerous strands. Remove one strand and apply glue along the length of the strand. Roll it between your palms and voila, you have your jute twine ready.
The silver doodle is a sticker from Pie Lane.
 5. Side 2 - Mark the area of the photo on this side too. 
 6. The corners are made from left over paper scrap
7. Make the design for side 2 as desired. I made a quilled design for this side. 


 8. You may chose to remove the wire from the calendar and decorate it using ribbons, quilling strips or some other material. I used nylon stings of 2 colors to weave a criss-cross design as shown below.


Challenges entered:
Cheerfulstamppad: Recycle

October 4, 2007

Double-sided Photo frame

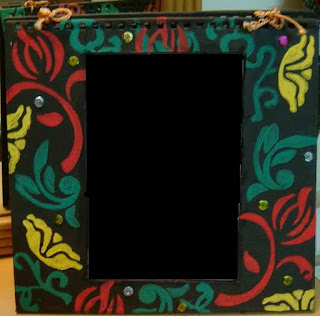
I created this photo frame from an old desktop calendar. This frame is double-sided, i.e. u can put pictures on both sides.

Remove the pages from the calendar and remove the spring on top. Then cut-out the mid portion of the size of ur photographs.
Decorate the frame as desired and embellish with sparkles and sequins.

For this frame I used sponge stamps from Hobby Ideas.

And voila, the frame is ready!!!


Related Posts Plugin for WordPress, Blogger...