Hi Everyone!! I have been meaning to write this post since a long time and share my experience of planning my son's first birthday party. As a first time parent we want to do our best and make our child's first birthday memorable for them. Though at that age, they don't really know what's going around, but the beautiful memories we create for them, would surely make them cherish it once they grow up.
When I started thinking of how to celebrate my son's birthday, I got thoroughly confused. Whether to celebrate at home, or at a hotel, how many guests to invite, whom to invite, theme, whether to hire a party planner. And then even the thought of having a quiet celebration with family came to my mind.
After lot of research on the net, about the theme, ideas, whats and hows, I finally decided to have a grand party, but with only close family and friends in presence.
I began by shortlisting the theme and then looked for party planners in Mumbai. They had grand packages and most of the packages had half of the stuff I did not require. As a crafter myself, I felt I could manage most of the stuff myself. Also I wanted to do my best for his birthday and began designing the stuff myself.
The main criteria for selecting the theme was the ease with which I could find the craft supplies as I was at my mom's place in Pune and I wanted to keep the decor simple, with no big and jazzy backgrounds. That's how I zeroed in on the 'Rainbow and Chalkboard' theme.
After finalising the hotel, I did hire a party planner for the ballon decor, DJ, game host, but rest of the party decor and cake ideas were mine.
Below is a step by step detail of all the stuff I created:
1. The Overall Decor: The balloon pillars and balloon grape hangings were done by the party planners. I gave them the brief as to how I wanted it to be. The cake table was placed at one end of the hall, with the gifts table beside it. On the other side of it was the DJ console. Next to the gifts table was the photo garland that I made.
These two balloon pillars were placed at the entrance of the party hall. On entering the hall, first was the birthday wishes board. The photo booth was set up next to it. On both sides we had two activity counters: can game and tattoo corner.
2.
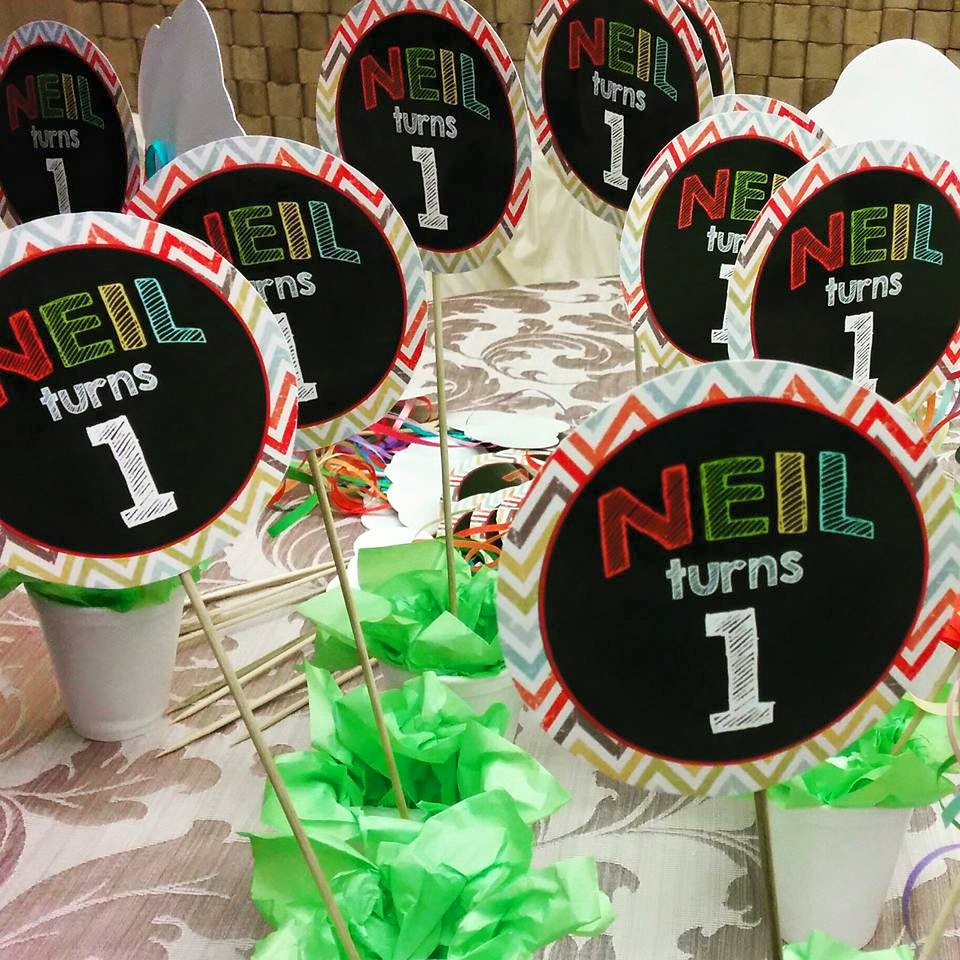
Center Table: The seating was done in a semi-circular manner. I designed a center table decoration and placed it on each table.
The center table decoration had a balloon on a stick, a 'Neil turns 1' prop and a cloud wand, both created by me. I placed all of these in a styrofoam glass and filled it with sweets.
3.
The Cake Table and background banner: I was inspired by
this rainbow party decor idea for the overall look of the cake table. I made the banner with 4 black chart papers and alphabet cutouts.
4. Rainbow theme cake: The cake table had a rainbow theme cake and the flavor was 'Death by Chocolate'. On the cake table we had candy floss, cupcakes, jelly sweets, jelly lollipops, and some rainbow colored mint sweets. I also placed the monogram 'N' and the chalkboard poster on the table.

And since it was our 7th anniversary too on the same day, we ordered another cake which had rainbow layers inside.
5. Photo Garland: This photo garland had photos of my son for all the 12 months of his first year. It now adorns my living room.
6. Photo Booth background and props: This is something I was most excited about and it came out pretty well. A rainbow colored background made using birthday streamers. The clouds on the upper part was a last minute idea.
I also created a sign board for the Photo Booth area and lots of props in chalkboard theme.
7. Birthday wishes board: I had little time in hand to make a wishing board, so this was a quick fix. We stuck black chart papers on a white board and placed colored post-its for guests to write their messages on. I used a slate and colored chalk to make a sign board for this.
8. Return Gifts and Game prizes: We had limited kids for the party and I planned the gifts accordingly. Ben10 themed, green sling bags for boys and Barbie themed bags for girls. Each bag had a thank you tag on it. The green guft wrapped boxes were game prizes.
The contents of the bag were a fun craft activity box and respective theme stationery set and few sweets.
9. Digital Invitation Cards: I designed the invitation cards myself and mailed them to the guests.
Here again I followed the same color scheme: chalkboard background and a rainbow colored fonts.
10. Center Table Wand: I designed the center table wands, printed and cut them out, and then stuck them onto a stick so that they could be placed in vases for decoration.
11. Thank You Tags: These thank you tags were attached to the return gift bags.
12.
Chalkboard Poster: I really wanted to make this poster for Neil and thankfully I found a superb tutorial for the same.
Here is the link to the tutorial. You can see the framed version placed on the cake table. (pic above).
13. Monogram N: I made a 3D monogram with cardboard for the cake table. I will soon share a detailed tutorial for it on my blog.
14. Khoi bag/Pinata: This was made by the party planner, but I thought of sharing it here since it matched the theme beautifully.
This sums up everything related to the party decor. Hope you like my creations and in case you have any queries please feel free to get in touch with me. I leave you with some pictures from the party.